Connect With Your Provider
- GitHub
- GitLab
- Bitbucket
- Generic git server
- Add a link to an additional git provider
- Disconnect a linked git provider
- Authenticating using an API access token
GitHub
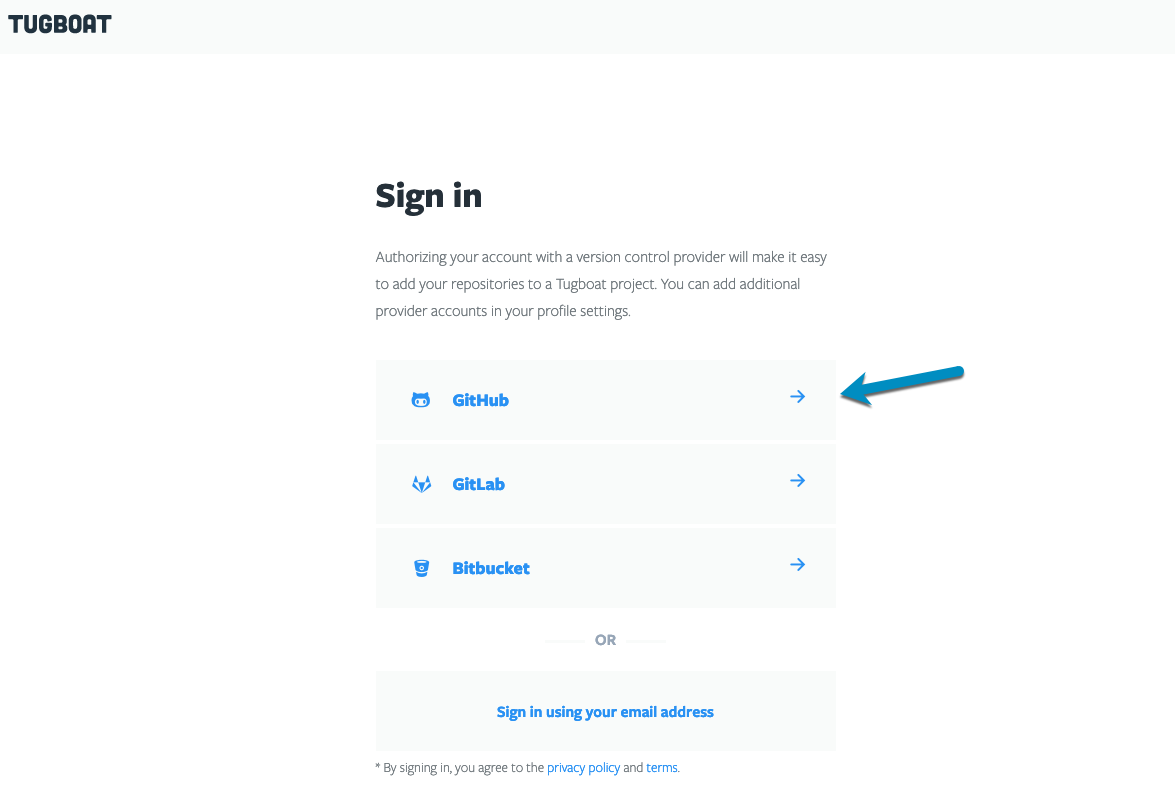
How do I link Tugboat to GitHub?
- Go to Sign In and select GitHub.
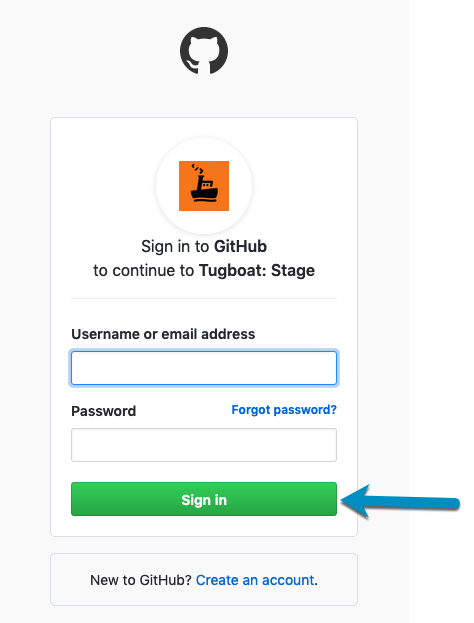
- Enter your GitHub Username and Password (or Create an Account), complete Two-Factor Authentication.
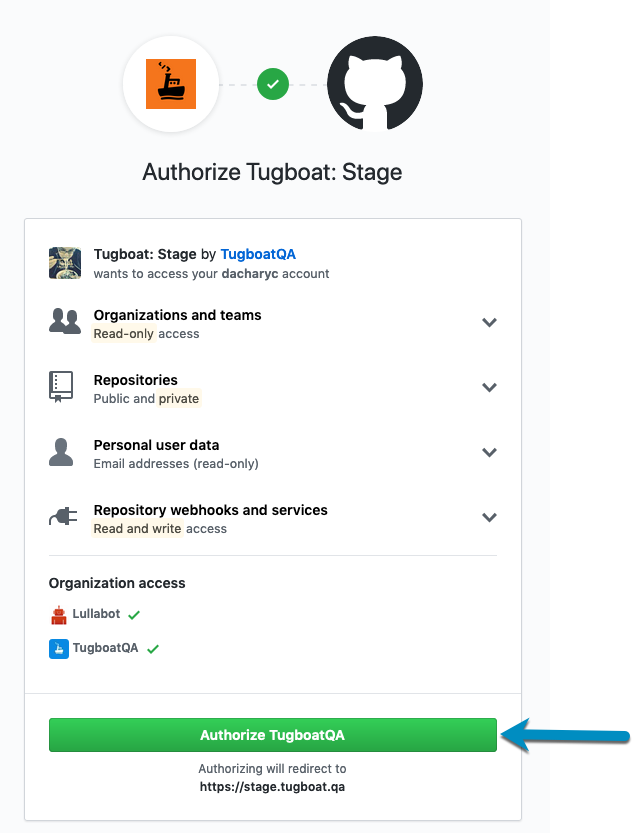
- Authorize Tugboat.
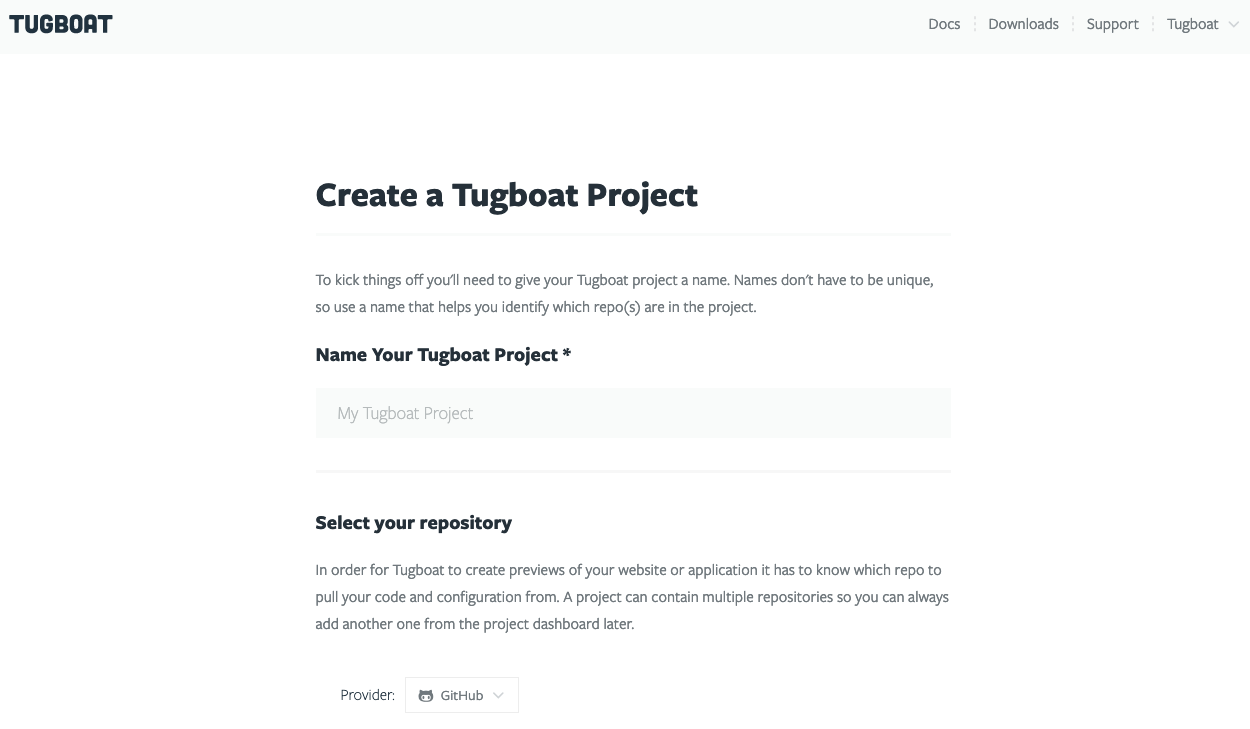
Once you complete GitHub authorization, you’ll be redirected to the Create a Tugboat Project screen.
Using the GitHub integration
The GitHub integration gives Tugboat the following features, which you can access in your Project -> Repository Settings:
- Build Pull Requests automatically On by default; Tugboat automatically creates a Preview when a GitHub pull request is opened.
- Rebuild updated Pull Requests automatically On by default; Tugboat automatically rebuilds a Preview when the corresponding pull request is updated.
- Delete Pull Request Previews automatically On by default; Tugboat automatically deletes a Preview when its pull request is merged or closed.
- Set Pull Request status On by default; Tugboat updates the pull request status to reflect the state of its Preview.
- Set Pull Request deployment status Off by default; Tugboat adds a deployment update to the pull request when a Preview is built.
- Post Preview links in Pull Request comments Off by default; Tugboat adds a comment to a pull request with links to its Preview. The comment author is the person who authenticated the git repo to Tugboat; to change this, see: Add a Tugboat Bot to your team.
- Build Previews for forked Pull Requests Off by default; Tugboat builds Previews for pull requests made to the primary repo from forked repositories. There are security implications from using this setting: any secrets in your Preview will be accessible by the owner of the forked repository. When this feature is not enabled, forked pull requests show as available to build (or will attempt to build automatically if you have Build Pull Requests Automatically enabled) but the Preview build will fail.
You can also specify the account from which comments are posted to GitHub in this section. For info on customizing this, see: Add a Tugboat Bot to your team.
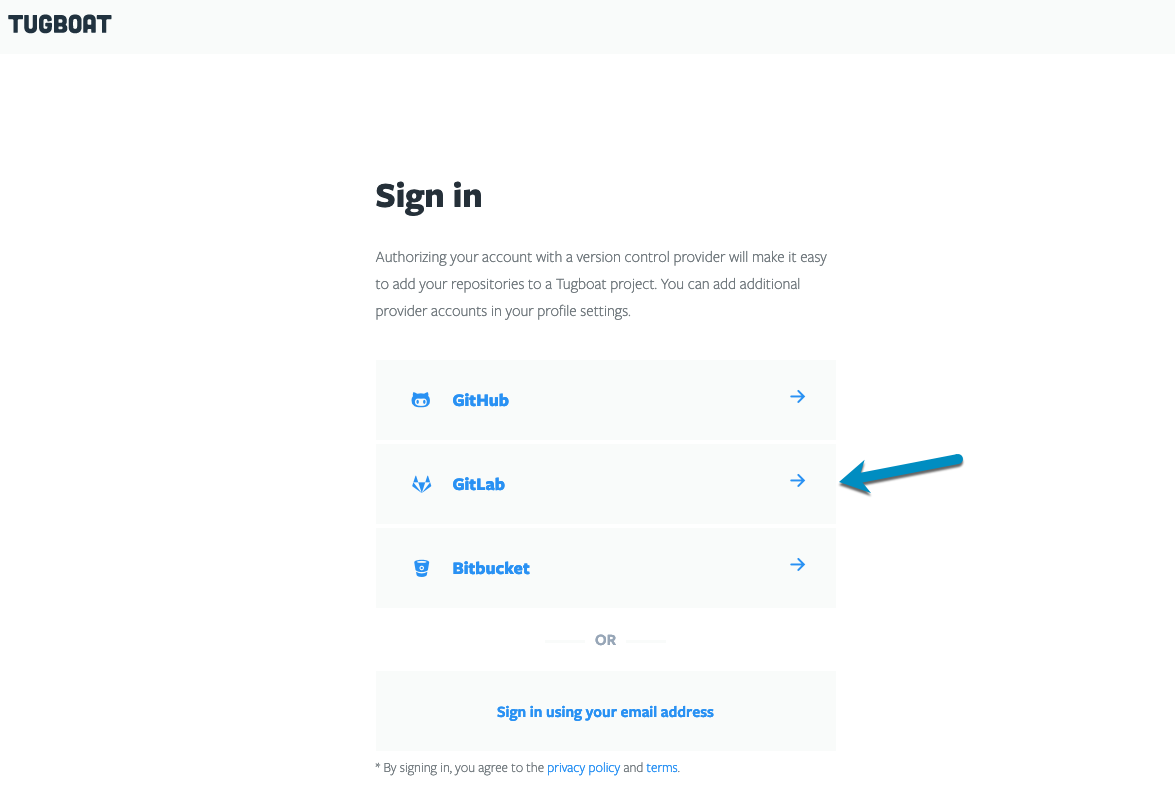
GitLab
How do I link Tugboat to GitLab?
- Go to Sign In and select GitLab.
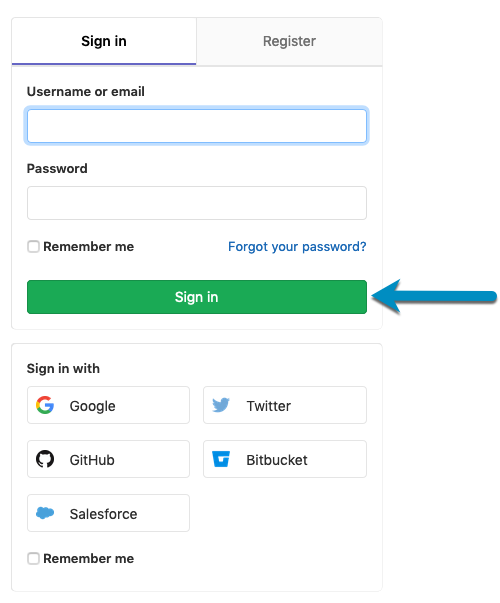
- Enter your GitLab Username and Password (or Register).
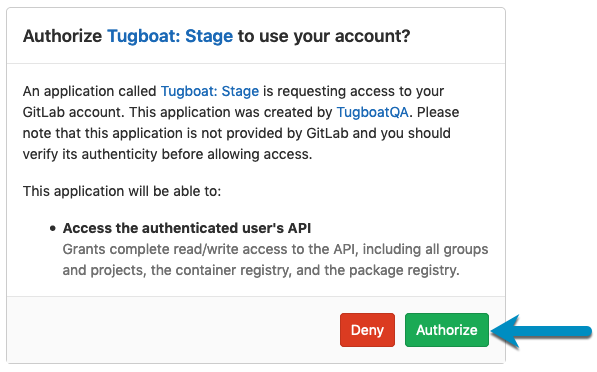
- Authorize Tugboat.
Once you complete GitLab authorization, you’ll be redirected to the Create a Tugboat Project screen.
Using the GitLab integration
The GitLab integration gives your Tugboat the following features, which you can access in your Project -> Repository Settings:
- Build Merge Requests automatically On by default; Tugboat automatically creates a Preview when a GitLab merge request is opened.
- Rebuild updated Merge Requests automatically On by default; Tugboat automatically creates a Preview when the corresponding merge request is updated.
- Delete Merge Request Previews automatically On by default; Tugboat automatically deletes a Preview when its merge request is merged or closed.
- Set Merge Request build status On by default; Tugboat updates the merge request build status to reflect the state of its Preview.
- Post Preview links in Merge Request comments Off by default; Tugboat adds a comment to a merge request with links to its Preview. The comment author is the person who authenticated the git repo to Tugboat; to change this, see: Add a Tugboat Bot to your team.
- Build Previews for forked Merge Requests Off by default; Tugboat builds Previews for merge requests made to the primary repo from forked repositories. There are security implications from using this setting: any secrets in your Preview will be accessible by the owner of the forked repository. When this feature is not enabled, forked merge requests show as available to build (or will attempt to build automatically if you have Build Merge Requests Automatically enabled) but the Preview build will fail.
You can also specify the account from which comments are posted to GitLab in this section. For info on customizing this, see: Add a Tugboat Bot to your team.
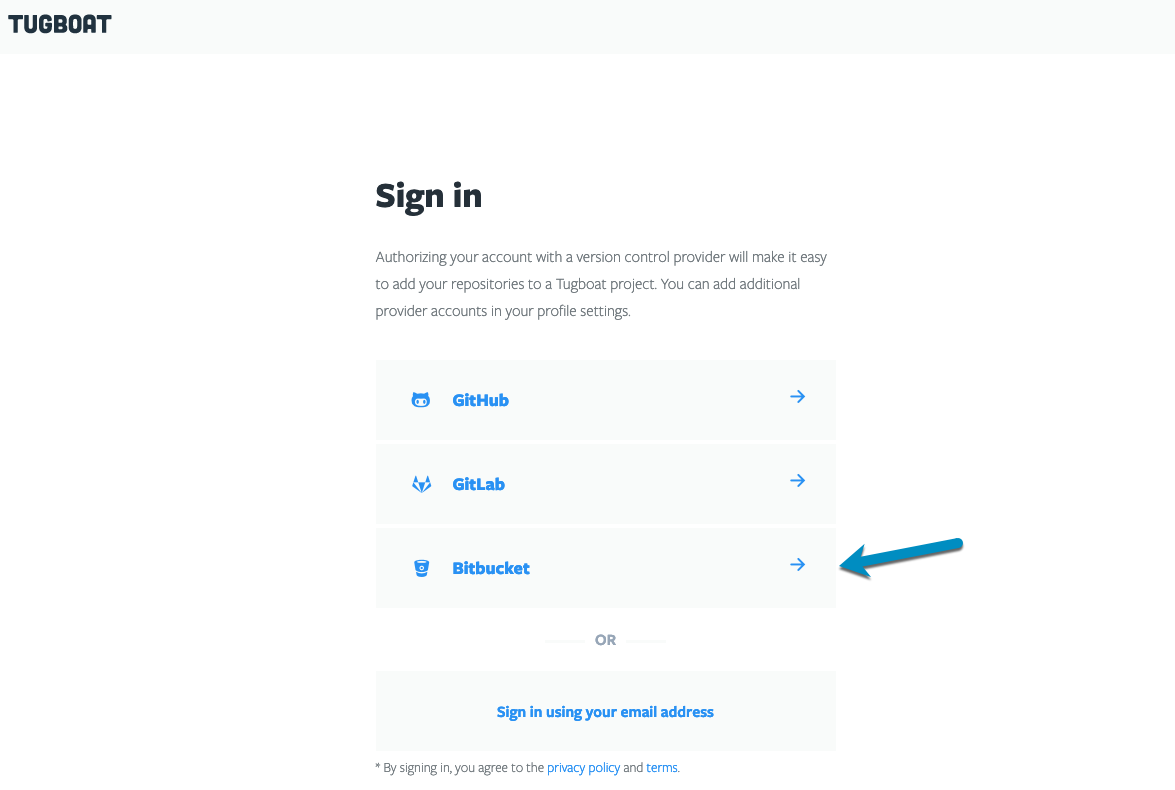
Bitbucket
How do I link Tugboat to Bitbucket?
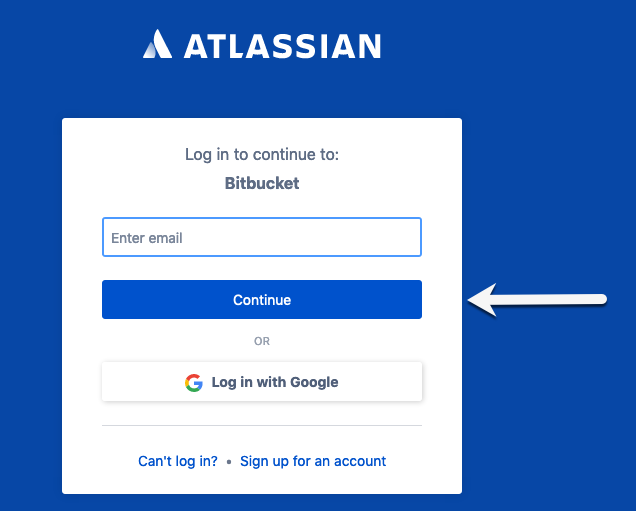
- Go to Sign In and select Bitbucket.
- Enter your Bitbucket Email and Password (or Sign up for an account).
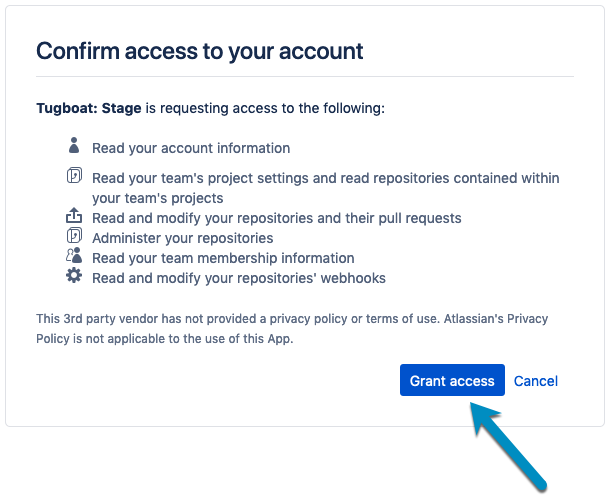
- Grant Access to Tugboat.
Once you complete Bitbucket authorization, you’ll be redirected to the Create a Tugboat Project screen.
Using the Bitbucket integration
The BitBucket integration gives Tugboat the following features, which you can access in your Project -> Repository Settings:
- Build Pull Requests automatically On by default; Tugboat automatically creates a Preview when a Bitbucket pull request is opened.
- Rebuild updated Pull Requests automatically On by default; Tugboat automatically rebuilds a Preview when the corresponding pull request is updated.
- Delete Pull Request Previews automatically On by default; Tugboat automatically deletes a Preview when its pull request is merged or closed.
- Set Pull Request status On by default; Tugboat updates the pull request status to reflect the state of its Preview.
- Post Preview links in Pull Request comments Off by default; Tugboat adds a comment to a pull request with links to its Preview. The comment author is the person who authenticated the git repo to Tugboat; to change this, see: Add a Tugboat Bot to your team.
- Build Previews for forked Pull Requests Off by default; Tugboat builds Previews for pull requests made to the primary repo from forked repositories. There are security implications from using this setting: any secrets in your Preview will be accessible by the owner of the forked repository. When this feature is not enabled, forked pull requests show as available to build (or will attempt to build automatically if you have Build Pull Requests Automatically enabled) but the Preview build will fail.
You can also specify the account from which comments are posted to Bitbucket in this section. For info on customizing this, see: Add a Tugboat Bot to your team.
Generic Git Server
If you’re not using GitHub, GitLab, or Bitbucket, you can use a generic git server with Tugboat. You’ll sign into Tugboat using an email address, and when you go to add a repo to your Tugboat project, you can link to a Git URL.
If your repo isn’t connected via Tugboat’s GitHub, GitLab, or Bitbucket authentication, you won’t have the integration features to automatically build Previews from Pull Requests, and other related functionality. If you add GitHub, GitLab, or Bitbucket authentication later, you’ll need to delete your generic git server from your project, and add it again to use it.
Adding a link to a git provider
Need to add a git provider to your Tugboat account? Whether you created your initial Tugboat account with an email and now want to add a git provider, or whether you’re adding your second or third git provider, here’s how to connect your Tugboat account with additional git providers:
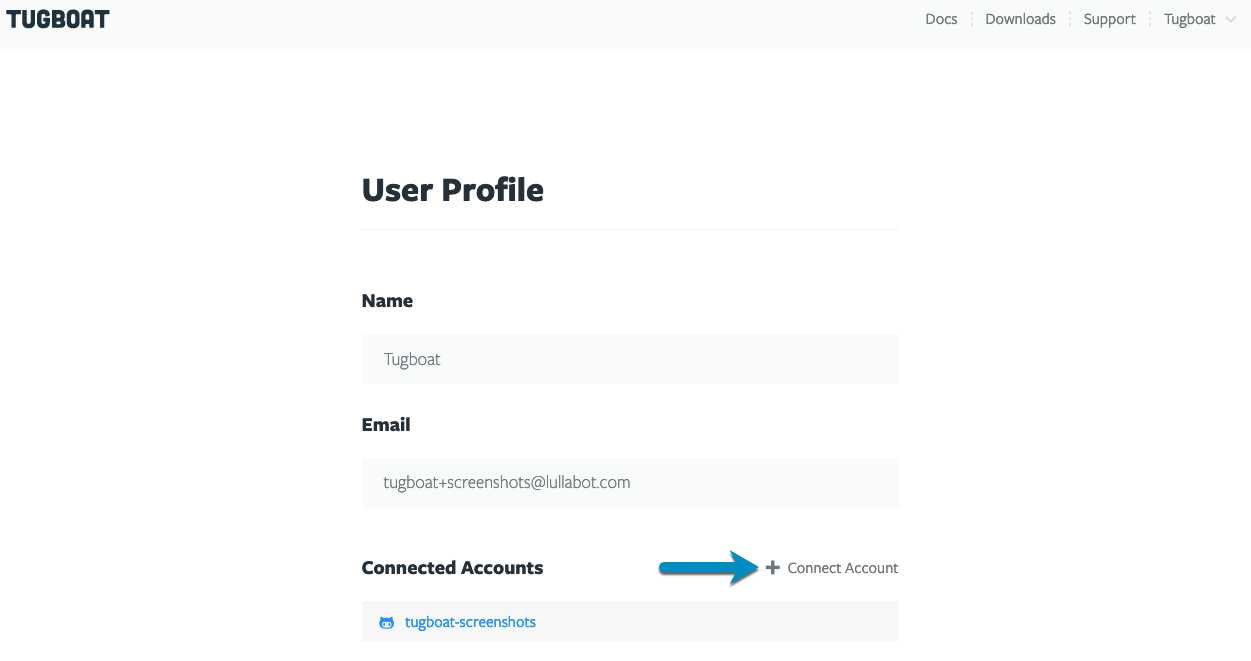
- Click the User drop-down in the upper right-hand corner of the Tugboat dashboard, and select Profile.
- Click the + Connect Account link.
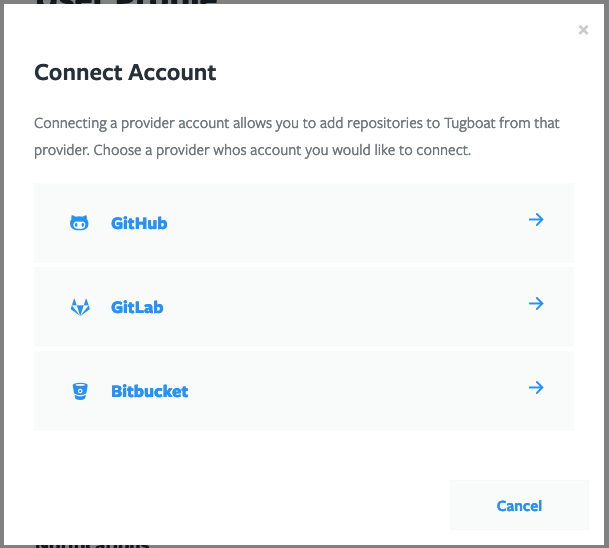
- Select the git provider whose account you’d like to connect.
- Follow the instructions to connect to GitHub, GitLab or Bitbucket.

Disconnect a linked git provider
If you leave an organization or close a git provider account, you may want to disconnect a linked git provider from your Tugboat account. To do this:
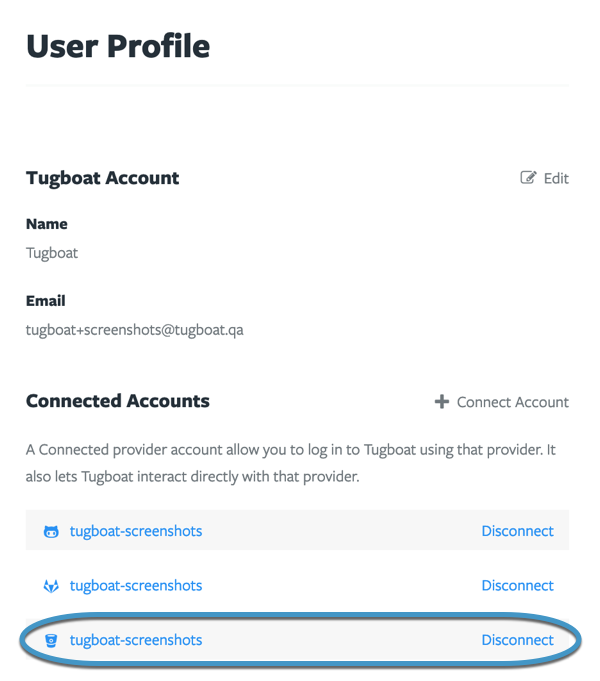
- Click the User drop-down in the upper right-hand corner of the Tugboat dashboard, and select Profile.
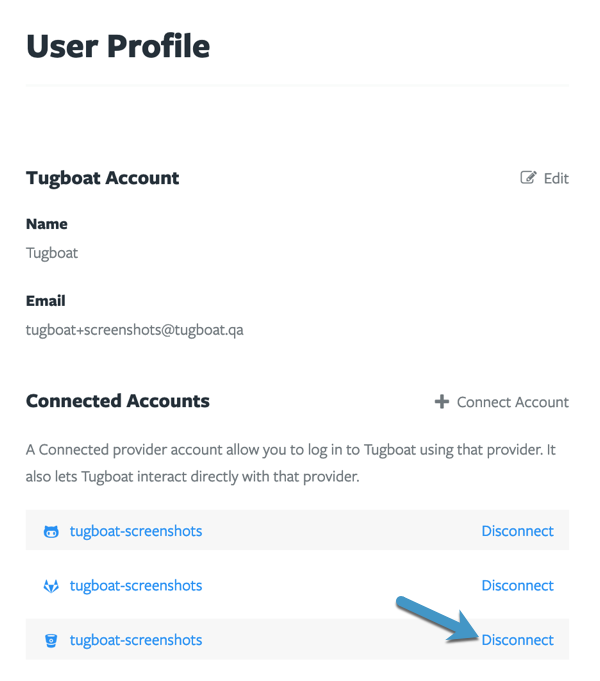
- Select the git provider whose account you’d like to disconnect.
- Click the Disconnect link.
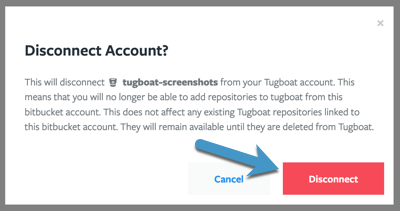
- You’ll see a dialog box explaining what happens if you disconnect a linked account; if you want to continue, press the Disconnect button.
Authenticating using an API access token
By default, Tugboat uses OAuth to authenticate to git hosting providers. However, there may be times when organization administrators can’t or won’t approve Tugboat as an organization-level OAuth application. As a workaround, you can use a git provider’s API access token to add a GitHub, GitLab, or Bitbucket repo to Tugboat.
You’ll need to use the Tugboat API to pass an alternate authentication method.
This example shows how to implement this workaround for a GitHub repository, but you can do the same thing using a
slightly different syntax for GitLab or Bitbucket repositories. If you need help with the syntax for GitLab or
Bitbucket, take a look at
the API documentation for the Create a Repository endpoint.
If you have other questions about this workaround, feel free to reach out to us for support.
Prerequisites
- You must have administrator permissions on GitHub for the repo you would like to add to Tugboat.
- You must already have an account on Tugboat and have created a Tugboat project. More on this below.
- You must be an Admin or Owner on Tugboat for the aforementioned project in #2.
Implementation Instructions
Open a command-line shell / terminal on your local computer
You’ll need some environment variables to make this API call.
First, export the Tugboat Project ID for the Project that you’d like to add this GitHub repo to. To find the project ID,
see How to find Tugboat IDs -> Project ID. Then run the following command in your shell,
replacing [tugboat-project-id] with this ID.
export PROJECT=[tugboat-project-id]
If you don’t have a Tugboat project, you’ll need to create one by connecting any other repository to Tugboat. You can then remove the repo from the Tugboat Project afterward.
Create a Tugboat API access token
Generate an access token in order to use the Tugboat API. Follow the instructions at Set an Access Token to generate your access token.
Once you have the access token, switch back to your terminal and paste in the following line, replacing
[your-tugboat-token] with this access token.
export TUGBOAT_TOKEN=[your-tugboat-token]
Create a GitHub personal access token
- Go to GitHub -> Personal access tokens and click Generate new token.
- Name your token something recognizable, such as “Tugboat for ExampleOrg/ExampleRepo”
- Under Select scopes, check the checkbox next to repo.
Save the token, switch back to your terminal, and export the token as an environment variable, replacing
[github-api-token]with your new token.export GH_TOKEN=[github-api-token]
Export additional environment variables
Export the GitHub organization that owns the repository as an environment variable, replacing [github-organization]
with your organization.
export GH_ORG=[github-organization]
Export the Repo name as an environment variable, replacing [github-repo-name] with the name of the repository you want
to connect to Tugboat.
export GH_REPO=[github-repo-name]
Once you’ve done all the above, you can create an environment variable to integrate a few of these into a JSON payload that will be sent to the Tugboat API. Copy and paste this directly into your shell:
export PAYLOAD=`printf '{ \
  "project": "%s",\
  "provider": { "name": "github" },\
  "repository": { "name": "%s", "group": "%s" },\
  "auth": { "token": "%s" },\
  "name": "%s/%s"\
}' "$PROJECT" "$GH_REPO" "$GH_ORG" "$GH_TOKEN" "$GH_ORG" "$GH_REPO"`
Make cURL request to the Tugboat API
Once that is complete, you are ready to make the cURL request to the Tugboat API to connect the GitHub Repo to Tugboat. Copy and paste this directly into your shell:
curl -H "Authorization: Bearer $TUGBOAT_TOKEN" \
     -H "Content-Type: application/json" \
     -X POST -d "$PAYLOAD" \
     https://api.tugboatqa.com/v3/repos